
I’ll be truthful when I say that we hardly ever use our AC, especially in the Caribbean where there are constant cooling breezes. However, in New England and the Chesapeake, where the breezes die at night, that’s a different story.
On the rare occasion that we tie up in a marina, even in the Caribbean, we use our AC to stay cool. The problem, even in trade winds, is that in a marina, we are generally not facing directly into the breeze so getting sufficient air below can be a problem.
When we found ourselves in the midst of pandemic lock-down in St Lucia last winter we fired up the AC units only to find that both units were just blowing hot air as they had lost their coolant charge. We contacted a tech who quickly recharged them both and cool we were again.
Unfortunately, that “repair” was only short lived and when we arrived in Florida, following our run home to the US, both units were again low on coolant.
I contacted a local tech that declared both units dead and recommended that they be replaced. His opinion, after making a service call of course, was that it never made sense to try and repair what he referred to as “package units”, those units where the entire system is housed in a single “package”. He went on to say that the life expectancy was about 7-8 years. So, I guess that Pandora’s units, now more than a dozen years old, were well overdue.
This is the front unit after it was removed, and it sure looked ready for the scrap heap. Note all the rust in the drip pan. I had the forward unit replaced by a tech in FL, but replaced the aft unit myself while Pandora was in Annapolis. It was surprisingly easy although I did have a tech hook up the unit and check that it was running properly. 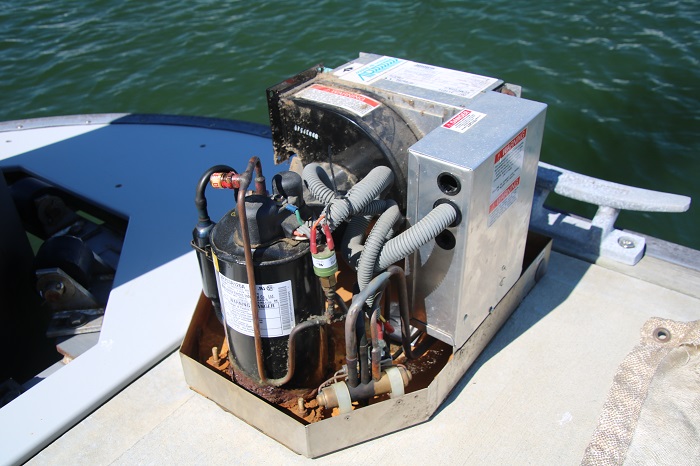 The forward unit, a 6,500 BTU Dometic unit was very easy to get at, located in the back of a roomy forward hanging locker. Getting to the unit was very simple and yet the installation still took the tech nearly two days.
The new unit, also the same 6,500 BTU output, but with a stronger blower, is much improved and works beautifully. 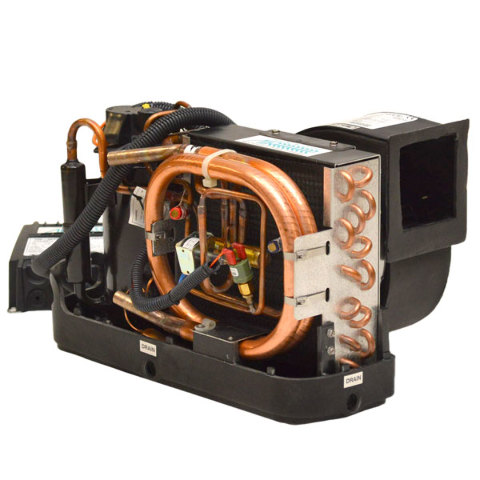 One issue with any AC unit is that they give off a lot of water that drips off of the condenser and can add up to several gallons per day, per unit. Normally, this water drains into the bilge, which isn’t ideal. In this case, the tech recommended that I add a special positive drainage device that installs into the cooling water exit line. It is the grey unit with the red arrow. It also has a small strainer to the right to be sure that nothing can be sucked into the unit and block the tiny exit hole.
 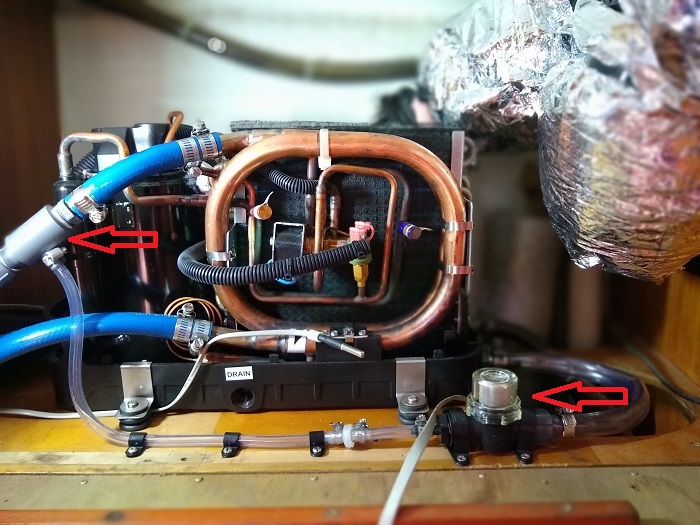 The principle behind this active condensate drain is that when the water is forced through the narrow part of the fitting, it passes a small hole on the bottom, causing a vacuum that sucks out the condensate and evacuates it overboard as part of the cooling water. The suction is caused by the venturi principle where a fluid is passed horizontally, constricted as it passes a hole, causing the formation of a vacuum.
 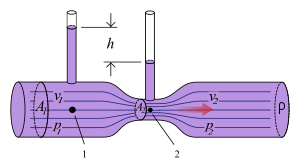 It’s a simple, elegant approach and works very well. I installed one on both units. I’d put in a link but could not find one on the Dometic site.
The aft 16,000 BTU Dometic unit had never cooled the main cabin effectively and after analyzing the installation, we determined that the two ducts that were part of the original installation, did not allow for sufficient air flow over the condenser and therefore caused the unit to ice up and further restrict air flow. We were never able to get the main cabin down below the high 80s. The prior owner told me that the unit was just too small for the boat. However, with modifications, this hypothesis proved to be incorrect. It was simply a badly designed installation.
After thinking about the problem, the simple answer was greater airflow, the addition of a third vent. The fix was simple, well simple in concept, as I had to install a new duct that went through the top of several lockers, using a 5.5″ hole saw, intimidating to use as it creates a lot of torque as it bites into the bulkhead.  I’ll admit that I really took a deep breath when I started to cut that 12″ square hole in a cherry bulkhead, but it turned out well.
 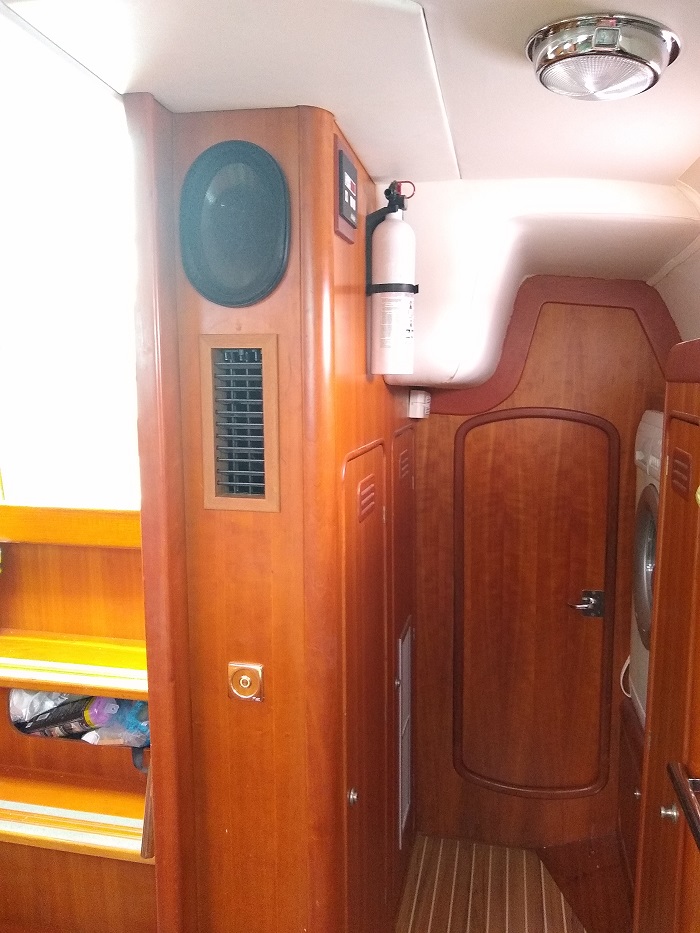 What a difference it the extra air flow has made and basically doubled the cooling capacity of the system. The original ducts included a 4″ duct with a very long run, in the main cabin and a 3″ vent in the aft cabin. It was not practical to change the main cabin duct but I upgraded the aft cabin duct to 4″ and the new duct in the galley at 5″, allowed for a substantial increase in capacity, matched to the system.
Adding air flow capacity to the system was doubly important as the new unit has a larger blower with greater flow. Now we get 60 degree air blowing right into the galley, where it is needed most. I also split the forward unit so that I could divert some of the cold air from the forward cabin back to the main cabin. That involved putting in a small 4″ louvered vent on the bulkhead adjacent to the unit in the forward locker. That was fairly simple and it is set up in a way so I can close it and divert all of the air into the forward cabin as needed. It is a nice edition and blows cold air over the starboard settee, the hottest part of the main cabin.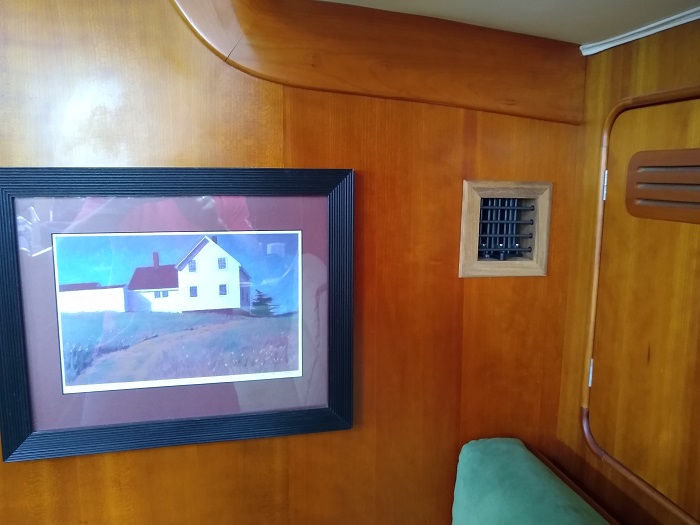 The unfortunate reality is that we had not been able to use our AC at all at anchor as Pandora does not have a built in generator. As I mentioned, previously, we have not felt a need to use the AC at anchor, when there is a breeze, but summers in the Chesapeake or New England, south of Maine can be stifling at night when the breeze dies.
With 600 watts of solar we have never felt the need to have yet another complex and EXPENSIVE piece of equipment on board and many of my friends with generators have reported plenty of maintenance issues, especially if they don’t use the generators regularly. And, to spend $20k+ to put in a generator and add all that weight to the boat when we won’t be using it much, doesn’t seem prudent.
Once the 16,000 BTU unit is running it doesn’t draw all that much power and the small Honda 2000 gas generator can handle it. However, when the compressor starts, the draw causes too much of a amp spike and causes the generator to surge, tripping the fuse every time.
With this in mind, the installer suggested that I install an “easy start”. It seems that these are very popular with the RV set as they are rarely “off the grid” but when they are, want to be able to use their AC. On boats, the surge of the compressor isn’t usually a problem because so many boats have diesel generators on board.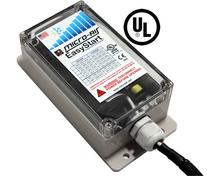 I understand that the Easy Start’s magic is that it “learns” the momentary peak draw of the starting compressor and somehow smooths out the load so the generator is not hit with a sudden jolt.
Installing the Easy Start was a bit anxiety producing even though it only has four wires as I was terrified that I’d “fry” my new AC unit if I made a mistake. However, the tech person at Micro-Air was very supportive and endured my four phone calls for reassurance.
Once installed, the instructions told me to turn on the generator and disable the Eco Mode, so that it was running at full RPM. Then I was to turn on the AC unit, wait for the compressor to kick in and then turn it off again. After 4 starts and stops, the unit will have “learned” the characteristics of my compressor and be ready to use.
After I completed this procedure, I restarted the Honda generator in eco mode and held my breath. It worked! The fan started, the compressor slowly spooled up along with the Honda, and cold air came out of the vents. Magic! What surprised me most was that the generator really didn’t seem to be running as fast as I had expected and wasn’t all that loud.
I won’t say that the generator, loud at nearly any speed, was quiet enough to run in a crowded anchorage at night but it was definitely a lot quieter than I had expected.
So, to make the generator quiet enough not to annoy my neighbors, I plan to build a sound deadening enclosure out of high temperature foam and a cooling fan to encase the generator. I will be sourcing materials for this project from McMaster Carr, an industrial supplier that I have used before.
They sell every imaginable type of material and I am sure that I can find what’s needed to muffle the sound so stay tuned for updates on that project. My plan is to share what I learn in putting this enclosure together along with a detailed materials list.
And Lord knows that I’ll have plenty of time to research and build that enclosure as I WON’T BE HEADING SOUTH THIS WINTER!
Did I mention that I will be hauling Pandora for the winter?
Thought so.
As always, details to come…