
It’s finally beginning to get warm here in CT and I am becoming more than a little anxious about what’s left to do as I prepare Pandora for launch. As I don’t expect (wish? pray? plan?) to put her up for another winter anytime soon, I have decided to tackle as many projects as possible while she’s covered and on the hard, so the list continues to grow even as I finish each project. This year the “getting ready for launch” has turned out to be more of a “refit” but the good news is that when she hits the water, she should be in great shape indeed.
When a boat isn’t fully covered, with protection from the weather, many of those need-to-do projects, the ones that might allow rain to get down below, somehow get put off. A good example is the Plexiglas companionway, a sliding hatch and three “boards” that secure the boat from intruders, people and water. Over the years they had all gotten very scratched and dull with use. They looked downright shabby. 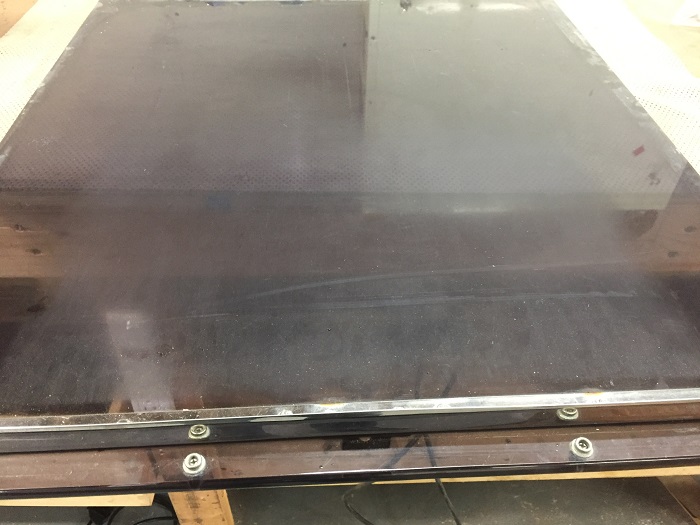 A while back I purchased an automotive buffer to bring back the shine to the paint and headlights on my little Suzuki truck and it worked really well. I needed it to make the truck look better, which it did but, frankly, I never thought that I would use it again. BTW, this is a link to the buffer I selected. It’s a much better unit, and more expensive, than one of the cheap ones available from Walmart or West Marine. It’s variable speed and random orbital which minimizes swirl marks or burns in the finish, which is vital to getting a good outcome. It also works with higher quality pads, the same ones that the pros use.
A few days ago, it occurred to me that it might be effective in polishing the scratched Plexiglas companionway boards so I pulled one off of the boat and gave it a try. Along with the buffer, I had purchased a set of three 3M polishing compounds that are progressively finer. The first in the series, and most aggressive, is labeled “compound” with the next two finer still, and when used in series, they are designed to bring a high shine to car paint. 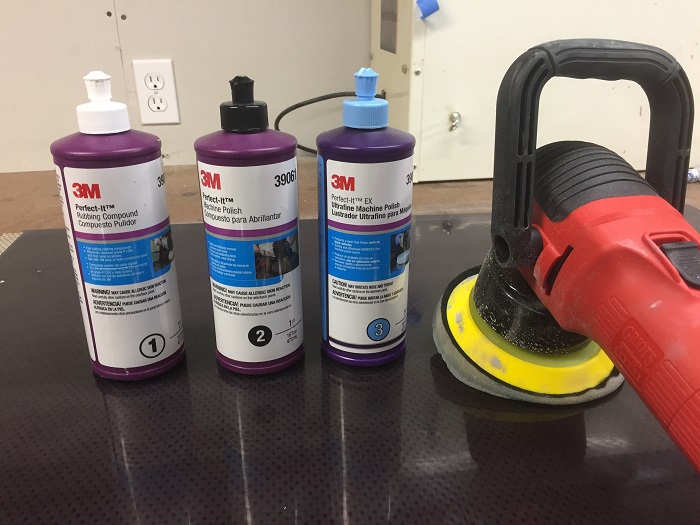 In this instance, I decided to skip the middle grade and went from the most aggressive compound to super fine, on both sides of the panels. The whole process didn’t take long at all, less than an hour, and the difference is striking. I also used the compound to shine the stainless, with a rag. I am really happy with the result and it was surprisingly easy to do.
 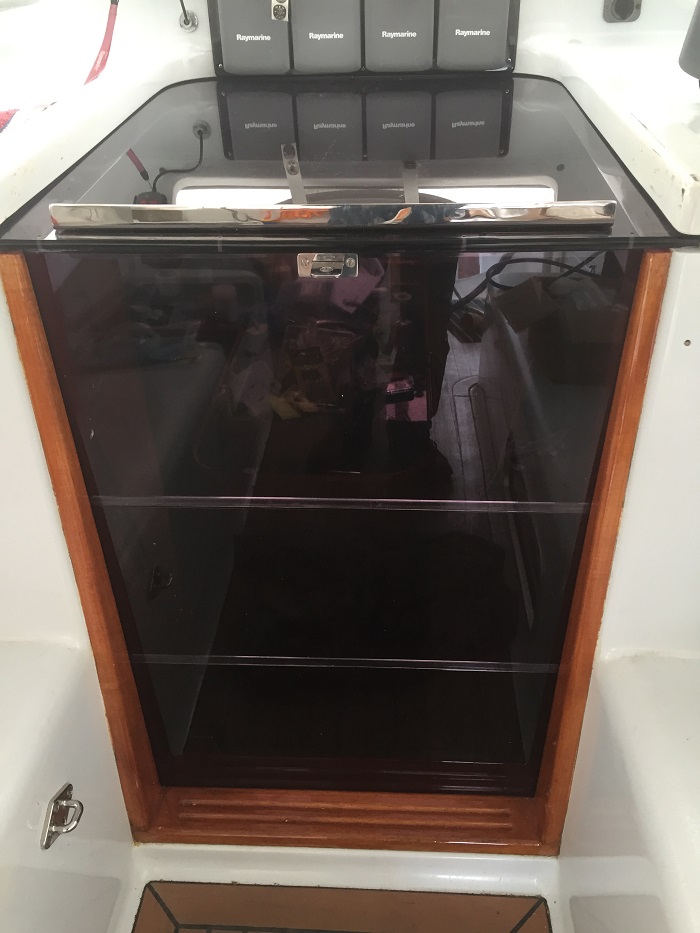 I have mentioned in a prior post that I was replacing all of the old, inefficient fluorescent fixtures with LED. Yesterday I installed the new fixtures in the cockpit. I decided to use a version that is smaller than the ones I selected for use below decks as I am hoping that they will not be too bright. I had a hard time identifying a model that would work on 24v but these are good for both 12v and 24v. Only a few years ago it was very difficult to find dual voltage fixtures and bulbs but they have become much more affordable and now are available in a nice warm white, 3,000k, which looks great.
All of the new bulbs and fixtures i am using are from DR LED. They have an extensive selection of LEDs for nearly any marine application. Their site looks like some kid set it up but, never the less, they have very broad range of great products. I do fear that even in red mode, and these fixtures are both red and warm white, may be too bright to use when on passage at night but I guess I’ll have to see how it goes. However, they should come in handy on buggy nights in Maine this summer. Fortunately, when we are in the Caribbean, there isn’t much of a problem with bugs unless we anchor too close to shore. It’s probably because it’s always blowing at least 20kts and there aren’t too many no-see-ums that can fly against a gale.
The old fixtures that I pulled out are a lot larger and I didn’t know what to do about the holes from the old fixtures so I just put in round head screws.  I have struggled to find LED replacement bulbs for the many halogen fixtures in the cabin that fit as most G4 LED replacement bulbs are not designed for use with a dimmer or are too big. Fortunately, Dr LED also makes a terrific little bulb that is small enough to fit in most any fixture, is very bright and yet dims well. These tiny bulbs are not cheap but they are a lot less expensive than replacing the entire light unit.
 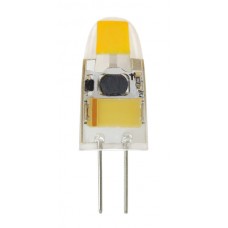 Well, there’s still plenty to do to get Pandora ready as I work my way through the list, one step at a time. Unfortunately, the list is long and it continues to grow at least as fast as I check items off.
I expect that my new cabin heater will arrive this week so I can begin that installation. It’s the type that uses waste engine heat, much like a car heater, to warm the cabin. This will come in handy when we are in Maine or when I am motor sailing in the fall or on rainy days. I already have a diesel heater that operates independent of the engine, but I thought it would be nice to have an engine driven option as well. In addition, it is higher output, 30,000 btu, so it should warm things up quickly.
As an added bonus, the engine was set up for this type of heater when the boat was built so I don’t have to worry about any plumbing, just a simple extension of the engine heater hoses and electrical hookups. Also, as a special bonus, this particular style of heater isn’t terribly expensive as they are designed for use in trucks and commercial fishing boats. For sure, if they were built for marine use… well, they’d be twice, no make that three times as expensive. This is the unit I selected from Summit Racing but in 24v. 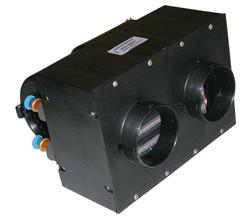 I also purchased a length of 3″ duct work and two outlets. I’ll be installing the unit and vents under the settees in the main cabin forward of the galley, hopefully, this week.
 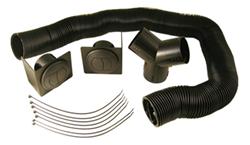 It’s always challenging to tackle projects on Pandora as the process, more often than not, feels more like a scavenger hunt, trying to find the right parts and not knowing where to get them. It is especially complicated when the parts are electrical as the boat is wired for 24v which usually means special order. As there were only three Aerodyne 47s built, I can’t just contact another owner to see how they might have solved a similar problem. For my last boat, a SAGA 43, there were more than 50 built and there was a very active owner’s forum with a number of owners who knew their boats inside and out and always had a quick answer to most any question.
Still to come will be re-bedding some of the deck hardware and yesterday I finally opened up all of the headliner under the traveler for the boom, so I now know exactly where the bolts are located and they appear to be easy to reach. The traveler has been the source of a persistent leak so now I know how to solve that problem, if I can only get the traveler off. Now I know that it will be easy to get at all the bolts but will it be easy to remove after all these years? Wish me luck.
I’ll also be continuing to work on the job of re-covering much of the headliner, some I’ll do myself, and the rest I’ll be hiring out.
So, here I am, May is only a little more than a week away and I still have tons to do. I’ll admit that the process to date has felt like two steps forward and one step back. I guess that’s what working on boats is all about. Perhaps my best wish will be that it not be two steps forward and three, or worse, steps back.
Well, it’s been a long cold winter, well at least compared to the Caribbean, but at least I’m moving in the right direction.
However, don’t ask me about that pesky mast “step”. Talk about steps backward…
But hey, the companionway is looking great and there are two new lights in the cockpit. That’s progress, right?
One response to “Two steps forward. Three steps back?”